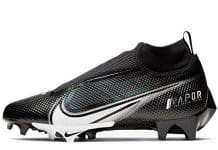
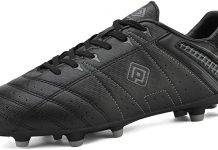
Breaking in new replacement cleats can be a daunting task, but fear not! We’re here to provide you with some tried and tested methods to safely break in those shiny new kicks.
From wearing them around the house to using stretching techniques, we’ll guide you through the process step by step, ensuring maximum comfort and minimal blisters. So, say goodbye to the days of uncomfortable footwear and hello to game-changing performance with our tips on safely breaking in new replacement cleats.
Importance of Breaking In New Replacement Cleats
Breaking in new replacement cleats is essential for a comfortable and successful sporting experience. By taking the time to properly break in your new cleats, you can enhance comfort, reduce the risk of blisters, improve traction and performance, and increase the durability and longevity of your cleats.
Review contents
Enhances comfort and reduces the risk of blisters
One of the key reasons for breaking in new replacement cleats is to enhance comfort. Cleats that have not been broken in may feel tight and uncomfortable, leading to blisters and discomfort on the field. By gradually wearing the cleats and allowing them to mold to the shape of your feet, you can minimize the risk of blisters and ensure a more comfortable fit.
Improves traction and performance
Another important aspect of breaking in new replacement cleats is improving traction and performance. When cleats are brand new, the studs or spikes may be stiff and not provide optimal grip on the field. By wearing the cleats and allowing the studs to loosen up, you can increase the traction and grip, which will significantly enhance your performance during training and matches.
Increases durability and longevity
Properly breaking in new replacement cleats can also increase their durability and longevity. By gradually introducing the cleats to wear and tear, you allow the materials to adjust and become more flexible. This helps to prevent premature damage or wear, ensuring that your cleats will last longer and continue to perform at their best.
Initial Preparations
Before embarking on the breaking-in process, there are a few important initial preparations to consider. These include choosing the right size cleats, inspecting and cleaning the cleats, and determining the break-in period.
Choosing the right size cleats
Selecting the correct size cleats is crucial for a successful breaking-in process. Ill-fitting cleats can lead to discomfort, blisters, and even injuries. It is important to measure your feet accurately and refer to the manufacturer’s sizing guide when selecting your new replacement cleats. Trying on cleats and ensuring that there is enough room for your foot to move comfortably within the shoe is essential.
Inspecting and cleaning the cleats
Before wearing your new replacement cleats, it is essential to inspect them for any defects or damage that may affect their performance. Check for loose stitching, missing studs, or any other issues that may warrant a return or exchange. Additionally, cleaning the cleats before breaking them in will help remove any factory residue and promote a more comfortable fit.
Determining the break-in period
It is crucial to understand that the break-in period for new replacement cleats can vary depending on several factors, including the type of cleat, the materials used, and personal preference. Some cleats may require a shorter break-in period, while others may need more time. It is essential to be patient and gradually increase the intensity of usage over time to allow the cleats to adjust to your feet.
Breaking-in Process
The breaking-in process is a gradual and systematic approach to ensure that your new replacement cleats become comfortable and perform optimally. By following these steps, you can ensure a smooth transition and minimize the risk of discomfort or injury.
Wear cleats around the house
To begin the breaking-in process, start by wearing your new replacement cleats around the house for short intervals. This allows your feet to get accustomed to the feel of the cleats and helps to initiate the molding process. Take note of any areas of discomfort or tightness, as these may need extra attention during the break-in process.
Gradually increase wearing time
As your feet become more accustomed to the cleats, gradually increase the amount of time you wear them. Start with shorter practice sessions or light workouts, and gradually extend the duration each time. This allows your feet to adapt gradually and minimizes the risk of discomfort or blisters.
Perform light exercises and stretches
In addition to wearing the cleats, incorporating light exercises and stretches into your break-in routine can help promote flexibility and comfort. Simple movements such as toe raises, heel stretches, and ankle rotations can help loosen up the cleats and improve overall comfort.
Blister Prevention
Blisters can be a common issue when breaking in new replacement cleats, but there are several strategies you can employ to prevent them.
Wear thick socks or use blister pads
Wearing thick socks or using blister pads can provide an additional layer of protection and reduce friction between the cleats and your feet. Look for socks specifically designed for sports that offer cushioning and moisture-wicking properties.
Apply moleskin or adhesive bandages
If you notice any areas of discomfort or irritation during the breaking-in process, applying moleskin or adhesive bandages can help provide additional cushioning and protect against blisters. Focus on areas where friction is likely to occur, such as the heel or toes.
Use antiperspirant or foot powder
To help prevent excessive sweating and moisture buildup, which can contribute to blister formation, consider using antiperspirant or foot powder. These products can help keep your feet dry and reduce the risk of friction and blisters.
Traction Enhancement
As the cleats begin to break in, it is important to focus on enhancing traction for optimal performance on the field.
Walk on different surfaces
To help loosen up the cleats and improve traction, walk on different surfaces such as grass, pavement, and artificial turf. This exposes the cleats to various textures and conditions, allowing them to adapt and provide better grip during gameplay.
Perform agility drills
Incorporating agility drills into your training routine can further promote traction enhancement. Exercises such as ladder drills, cone drills, and lateral movements help engage the cleats and improve your ability to change direction quickly.
Transition to on-field practice
As you progress through the breaking-in process, gradually transition to on-field practice sessions. This will help you get accustomed to the feel of the cleats in a realistic setting and fine-tune your performance. Pay attention to any areas where traction may be lacking and make necessary adjustments as needed.
Maintenance Tips
Proper maintenance is crucial in prolonging the lifespan of your replacement cleats and ensuring they remain in optimal condition.
Regularly clean and dry the cleats
After each use, it is important to clean off any dirt or debris from your cleats. Use a soft brush or cloth to gently remove any buildup, and allow the cleats to air dry completely before storing them. This prevents moisture-related issues and helps maintain the integrity of the materials.
Store in a cool and dry place
When not in use, store your cleats in a cool and dry place, away from direct sunlight and extreme temperatures. Excessive heat or cold can cause the materials to degrade or warp, compromising the performance and longevity of the cleats.
Replace worn studs or spikes
Over time, the studs or spikes on your cleats may become worn down or damaged. Regularly inspect them and replace any that show signs of wear or are no longer providing adequate traction. This will ensure that your cleats continue to perform optimally and reduce the risk of injuries.
Gradually Increasing Intensity
As your cleats become more comfortable and familiar, gradually increasing the intensity of your training sessions is essential to fully break in your new cleats.
Start with light practice sessions
Begin by incorporating light practice sessions into your routine. This allows your feet to further adapt to the cleats while gradually increasing the physical demands. Focus on perfecting your technique and getting comfortable with the movement patterns specific to your sport.
Gradually transition to full workouts
Once you feel confident and comfortable during light practice sessions, gradually transition to full workouts. Increase the intensity, duration, and complexity of your training to replicate the demands of competitive play. This will help further break in the cleats and prepare you for match-like scenarios.
Participate in match-like simulations
To complete the breaking-in process, engage in match-like simulations or low-pressure games. This will expose your cleats to the dynamic movements and conditions encountered during actual gameplay. Pay attention to any areas where the cleats may still need adjustment or additional break-in time.
Avoiding Injury
While breaking in your new replacement cleats, it is crucial to prioritize safety and avoid potential injuries. Implement these strategies to minimize the risk of harm.
Listen to your body and rest when needed
Pay attention to any signs of discomfort or pain during the breaking-in process. If your feet feel excessively sore or if you experience sharp or persistent pain, it may be a sign that you need to rest and allow your feet to recover. Pushing through pain can lead to injuries and hinder the progress of the break-in process.
Use proper technique during exercises
Maintaining proper technique during exercises and drills is essential to minimize the risk of strain or injury. Focus on maintaining good posture, engaging proper muscle groups, and using correct form. This will help distribute stress evenly and reduce the risk of overuse injuries.
Avoid excessive strain or intensity
While it is important to gradually increase the intensity, be mindful not to push yourself too hard or too quickly. Going from minimal activity to intense training can increase the risk of injury. Listen to your body and progress at a pace that feels comfortable and manageable.
Monitoring Break-In Progress
Throughout the breaking-in process, it is important to monitor the progress and make any necessary adjustments along the way.
Assess comfort level during wearing
Regularly assess the comfort level of your cleats during wearing. Take note of any areas of discomfort or tightness and address them promptly. If discomfort persists, consider consulting with a professional or revisiting the sizing or fit of your cleats.
Evaluate traction and agility
During training sessions or practice games, pay close attention to the traction and agility provided by your cleats. Note any improvements or areas that still need fine-tuning. This will allow you to make any necessary adjustments and ensure optimal performance on the field.
Monitor any signs of discomfort or pain
Lastly, monitor your feet for any signs of discomfort or pain that may indicate an issue with the break-in process. Persistent pain, blisters, or hot spots should be addressed promptly to avoid further complications. Seeking the advice of a healthcare professional can provide valuable guidance and ensure a safe and effective break-in process.
Finalizing the Break-In Process
Once your cleats feel comfortable, provide adequate traction, and have been thoroughly broken in, it is time to finalize the process and enjoy the benefits of your fully broken-in cleats.
Wear the cleats during low-pressure games
To further familiarize yourself with the cleats and ensure they perform optimally in real-game situations, wear them during low-pressure games or friendly matches. This will provide an opportunity to test the cleats in a more competitive environment and ensure they meet your expectations.
Make adjustments if necessary
During low-pressure games, take note of any areas where the cleats may still need improvement or adjustment. This could include adding or modifying cushioning in certain areas, replacing laces, or making minor changes to the fit. Making these adjustments will help fine-tune the cleats to your specific needs and ensure maximum comfort and performance.
Enjoy the fully broken-in cleats
Finally, once all adjustments have been made and your cleats have been thoroughly broken in, it’s time to enjoy the full benefits they offer. You can now have complete confidence in your footwear, knowing that they are comfortable, provide excellent traction, and are durable enough to withstand the demands of your sport.
By following these steps and taking the time to properly break in your new replacement cleats, you can ensure a comfortable and successful sporting experience. Remember to be patient, listen to your body, and make any necessary adjustments along the way. With well-broken-in cleats, you can focus on your performance, knowing that your footwear supports you every step of the way.


