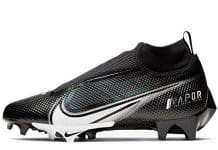
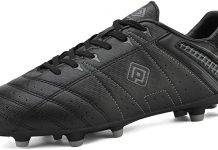
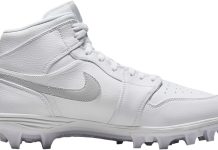
Are you wondering how to properly sanitize or disinfect your used cleats before selling or donating them? It’s important to ensure that these items are safe and clean for the next user. In this article, we’ll share some simple and effective methods for sanitizing and disinfecting your cleats, so you can confidently pass them on to someone else while maintaining hygiene standards. Whether you’re a sports enthusiast looking to declutter or a charitable individual wanting to spread the joy of a great pair of cleats, this guide will provide you with the necessary steps to prepare them for their new owner.
This image is property of www.wikihow.com.
Choosing the Right Cleaning Method
Cleaning your cleats is essential to maintain their functionality and prolong their lifespan. Before diving into the cleaning process, it’s crucial to determine the right cleaning method based on the material of your cleats.
Review contents
Assessing the Material of the Cleats
Different cleats are made from various materials such as leather, synthetic fabrics, or a combination of both. Therefore, it’s necessary to identify the specific material to ensure you choose a cleaning method that won’t cause any damage.
Leather cleats require gentle cleaning methods to prevent cracking or discoloration. On the other hand, synthetic fabric cleats can typically withstand more rigorous cleaning techniques. By assessing the material, you can effectively determine the suitable cleaning approach for your cleats.
Consideration for Different Cleaning Methods
Once you’ve identified the material of your cleats, it’s time to consider the various cleaning methods available. There are several options to choose from, each with its benefits and precautions.
Hand Washing with Mild Soap and Water
Hand washing is a popular and effective method for cleaning cleats. Start by removing excess dirt and debris from the surface using a soft brush or cloth. Mix a small amount of mild soap with warm water and gently scrub the cleats using a brush or sponge. Rinse thoroughly, ensuring no soap residue remains.
Machine Washing
If your cleats are suitable for machine washing, this can be a time-saving option. Before placing them in the washing machine, remove any excess dirt, and untie and remove the laces. It’s advisable to put the cleats in a mesh laundry bag or pillowcase to protect them from potential damage. Select a gentle cycle with cold water, use mild detergent, and avoid using bleach. Once the cycle is complete, air dry the cleats.
Using Disinfectant Wipes or Sprays
For quick and easy cleaning, disinfectant wipes or sprays are an excellent choice. These products effectively remove dirt, bacteria, and odor-causing germs from the surface of the cleats. Simply wipe or spray the disinfectant onto the cleats, following the instructions provided on the product packaging.
Preparing the Cleats for Cleaning
Before diving into the cleaning process, it’s essential to prepare the cleats adequately. Taking these steps will ensure a more efficient and effective cleaning experience.
Remove Excess Dirt and Debris
Start by removing any excess dirt and debris from the cleats. Using a soft brush or cloth, gently brush or wipe away any loose particles. This step will prevent the dirt from spreading further and making the cleaning process more challenging.
Untying and Removing Laces
To achieve a thorough cleaning, it’s necessary to untie and remove the laces from your cleats. This allows you to clean every nook and cranny without any hindrance. You can wash the laces separately using the appropriate method later.
Separating Removable Insoles
If your cleats have removable insoles, it’s advisable to take them out before cleaning. This will enable you to clean the insoles separately, ensuring thorough sanitation. Follow the manufacturer’s instructions for removing and cleaning the insoles to avoid any damage.
Cleaning the Cleats
Now that your cleats are prepared, it’s time to dive into the cleaning process. Choose the appropriate cleaning method for your cleat material and follow these steps to achieve optimal results.
Hand Washing with Mild Soap and Water
If you’ve chosen to hand wash your cleats, start by preparing a mixture of mild soap and warm water. Gently scrub the cleats using a soft brush or sponge, paying attention to any visible stains or dirt. Rinse thoroughly to remove all soap residue, as it can affect the cleat material and potentially cause discomfort during use.
Machine Washing
For machine washing, ensure that you’ve removed the laces and placed the cleats in a mesh laundry bag or pillowcase. Select a gentle cycle with cold water and use mild detergent to protect the material. Avoid using bleach, as it can cause discoloration or damage. Once the cycle is complete, allow the cleats to air dry naturally.
Using Disinfectant Wipes or Sprays
If you’re using disinfectant wipes or sprays, follow the instructions on the product packaging. Wipe or spray the cleats thoroughly, ensuring all surfaces are covered. These products are designed to eliminate bacteria, germs, and odors effectively.
Drying the Cleats
After cleaning your cleats, proper drying is crucial to prevent mold, mildew, and unpleasant odors. Consider the following methods to ensure your cleats dry thoroughly and effectively.
Air Drying
The most common and recommended method for drying cleats is air drying. Place the cleaned cleats in a well-ventilated area and allow them to dry naturally. It’s essential to ensure proper airflow to expedite the drying process and prevent any moisture buildup.
Using a Fan or Blow Dryer
If you’re in a hurry, you can use a fan or blow dryer to expedite the drying process. Set the fan or blow dryer to a low heat or cool setting and aim it at the cleats. Keep a safe distance to avoid overheating or damage to the material. Remember to continuously check the cleats’ temperature and remove them from the heat source if they become too hot.
Avoiding Direct Sunlight or Heat Sources
While it may be tempting to speed up the drying process by placing your cleats in direct sunlight or near a heat source, it’s best to avoid doing so. Direct sunlight and excessive heat can cause the material to warp, crack, or shrink. Stick to the recommended drying methods for optimal results and to avoid any damage.
This image is property of gabriellearruda.com.
Disinfecting the Cleats
In addition to cleaning, disinfecting your cleats is crucial, especially if you’re selling or donating them to others. Disinfecting eliminates any bacteria, fungi, or viruses that may be present on the cleats. Consider the following methods for effective disinfection.
Using Disinfectant Sprays or Solutions
Disinfectant sprays or solutions are convenient and efficient for cleat disinfection. Follow the instructions on the product packaging and apply the disinfectant evenly to the cleats. Pay attention to areas that are more prone to bacterial or fungal growth, such as the inside of the cleat and the sole.
Soaking Cleats in Disinfectant
For a more thorough disinfection, you can soak your cleats in a disinfectant solution. Prepare a mixture of water and an appropriate disinfectant solution according to the instructions provided. Submerge the cleats in the solution for the recommended amount of time, ensuring that all surfaces are adequately soaked. Afterward, rinse the cleats thoroughly to remove any residue.
Steam Cleaning
Steam cleaning is another effective method to disinfect cleats. Using a steam cleaner or steam-generating device, direct the steam onto the cleats from a safe distance. Move the device across the surfaces of the cleats, ensuring every area receives sufficient exposure to steam. The hot steam effectively kills bacteria, fungi, and viruses, leaving your cleats sanitized.
Dealing with Stubborn Odors
Unpleasant odors can be a common issue with well-used cleats. Fortunately, there are several methods to combat stubborn odors and keep your cleats smelling fresh.
Using Baking Soda or Activated Charcoal
Baking soda and activated charcoal are excellent natural remedies for eliminating odors. Sprinkle baking soda or place activated charcoal inside the cleats, ensuring that every corner is covered. Leave them overnight to allow the substances to absorb the odors. In the morning, simply shake out the excess baking soda or remove the activated charcoal.
Freezing the Cleats
Freezing your cleats can also help eliminate odors. Place your cleaned cleats in a sealable plastic bag and put them in the freezer for several hours. The extreme cold temperatures kill odor-causing bacteria and prevent them from reproducing. After freezing, allow the cleats to thaw naturally, and you’ll notice a significant reduction in odors.
Applying Odor Eliminating Sprays or Powders
There are various commercially available odor eliminating sprays and powders specifically designed for athletic gear. Follow the instructions on the product packaging and apply the spray or powder directly onto the cleats. These products neutralize and mask odors, providing a fresh scent.
This image is property of www.wikihow.com.
Cleaning and Sanitizing Insoles
Insoles can harbor bacteria and cause unpleasant odors if not properly cleaned. Follow these steps to ensure your insoles are thoroughly cleaned and sanitized.
Hand Washing Insoles Separately
Remove the insoles from the cleats and wash them separately from the main shoe. Gently scrub them with a mixture of mild soap and warm water. Pay attention to any areas with visible stains or dirt. Rinse thoroughly to ensure no soap residue remains, as this can cause discomfort or skin irritations.
Machine Washing Insoles
If the manufacturer’s guidelines permit, you can opt to machine wash your insoles. Put them in a mesh laundry bag or pillowcase to protect them during the washing cycle. Select a gentle cycle with cold water and a mild detergent. Once the cycle is complete, air dry the insoles to prevent any shrinkage or damage.
Using Disinfectant Sprays or Solutions
For effective sanitization, you can use disinfectant sprays or solutions on the insoles. Apply the chosen product according to the instructions, covering all surfaces of the insoles. Ensure the disinfectant is allowed to air dry completely before placing the insoles back in the cleats.
Cleaning and Sanitizing Laces
Don’t forget to give proper attention to your laces to ensure complete cleanliness and sanitization.
Hand Washing Laces
Hand washing laces is the safest option to prevent damage. Begin by removing any hardened dirt or debris from the laces. Fill a basin or sink with warm water and a small amount of mild detergent. Soak the laces for a few minutes, then use your fingers to gently rub the laces together to loosen any dirt. Rinse thoroughly and air dry.
Machine Washing Laces
If the laces are suitable for machine washing, you can include them in your laundry process. Remove any excess dirt, untie the laces, and place them in a mesh laundry bag or pillowcase. Wash them in a gentle cycle with cold water and mild detergent. Once the cycle is complete, remove the laces and allow them to air dry.
Using Disinfectant Sprays or Solutions
For a quick solution, you can use disinfectant sprays or solutions on the laces. Spray or apply the disinfectant evenly across the laces, ensuring complete coverage. Allow the disinfectant to air dry completely before using or storing the laces.
This image is property of www.wikihow.com.
Proper Storage and Packaging
After cleaning, drying, and disinfecting your cleats, it’s crucial to store them correctly to maintain their condition.
Allowing Cleats to Completely Dry
Before storing your cleats, make sure they are completely dry. Any residual moisture can lead to the growth of mold, mildew, or unpleasant odors. Ensure the cleats have been thoroughly air-dried or use other drying methods mentioned earlier.
Wrapping Cleats in Paper or Cloth
To protect your cleats from dust and damage, wrap them in acid-free tissue paper or a soft cloth. This additional layer prevents any unwanted scratches or marks during storage.
Storing in a Cool and Dry Place
Choose a storage location that is cool, dry, and away from direct sunlight or heat sources. Elevated temperature and exposure to sunlight can degrade the material of the cleats over time. Additionally, moisture or humidity can promote the growth of mold or mildew. Optimal storage conditions ensure your cleats maintain their quality until their next use.
Additional Tips and Precautions
Here are some additional tips and precautions to keep in mind throughout the cleaning process:
Wearing Gloves and Protective Gear
When handling cleaning products, it’s advisable to wear gloves and any necessary protective gear to protect your hands from potential irritants or chemical reactions. Additionally, it’s a good practice to work in a well-ventilated area to minimize exposure to any fumes.
Checking Manufacturer Guidelines
Always refer to the manufacturer’s guidelines for specific cleaning instructions. Different materials and brands may have specific recommendations that should be followed to ensure the best cleaning results without causing any damage.
Considering Professional Cleaning Services
If you’re unsure about cleaning your cleats yourself or if you want to ensure they receive a thorough cleaning, you can consider professional cleaning services. Professional cleaners specialize in cleaning and sanitizing athletic gear, ensuring optimal cleanliness and extending the lifespan of your cleats.
In conclusion, cleaning and sanitizing your cleats is essential for maintaining their performance, longevity, and hygiene. By choosing the right cleaning method, preparing the cleats accordingly, and following the proper steps for cleaning, drying, and disinfection, you can ensure your cleats remain fresh, odor-free, and ready for their next adventure. Remember to consider the specific material and manufacturer guidelines and always take precautions to protect yourself during the cleaning process. Proper storage and packaging will further safeguard your cleats until their next use.
This image is property of gabriellearruda.com.


